【GoogleMapsAPI】住所からGoogleMapを自動生成する
みなさん、こんにちは!
エンジニアのおちのです。
今回は、GoogleMapsAPIを使って住所からGoogleMapを自動生成する方法について書いていきます。
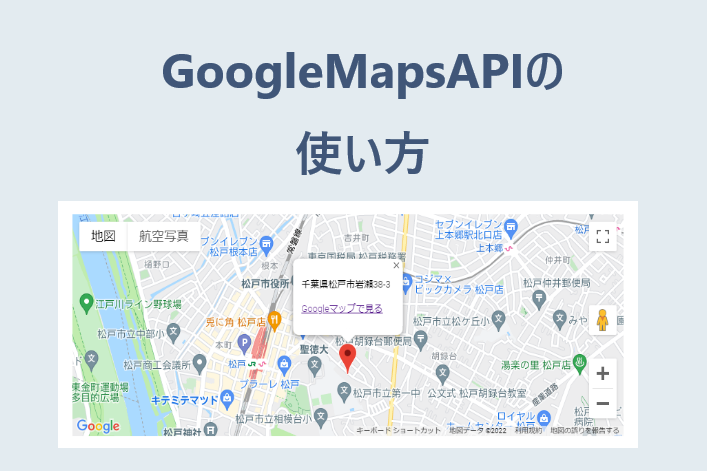
仕様イメージ
住所情報から、GoogleMapsAPIをコールしてGoogleMapを表示します。
APIキー取得
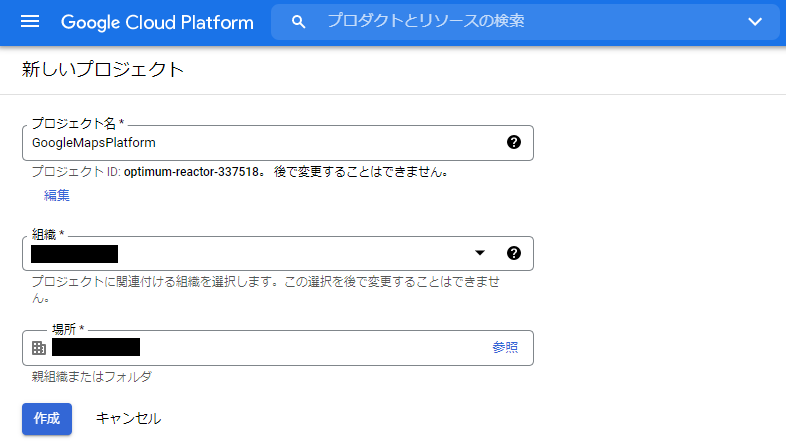
Google Cloud Platformでプロジェクトを作成する
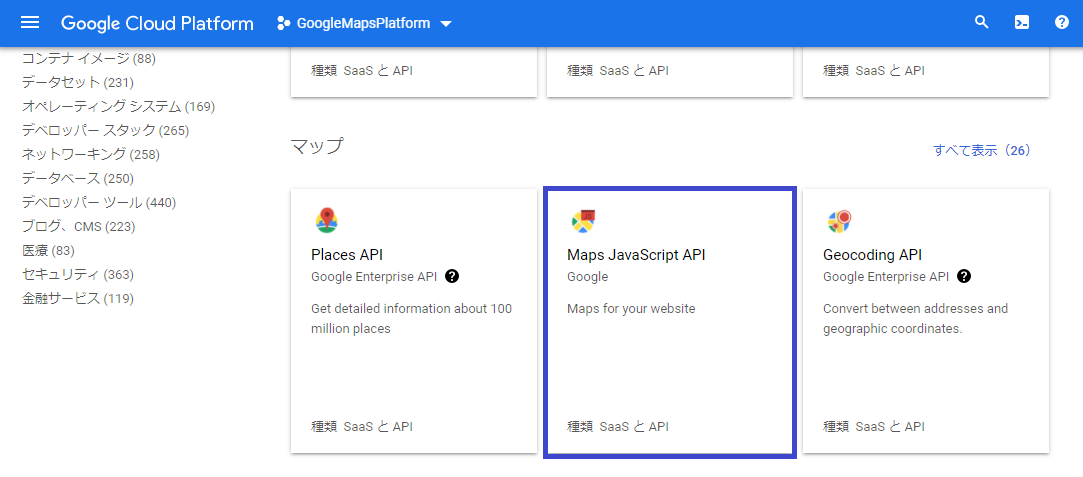
Maps JavaScript APIを有効化する
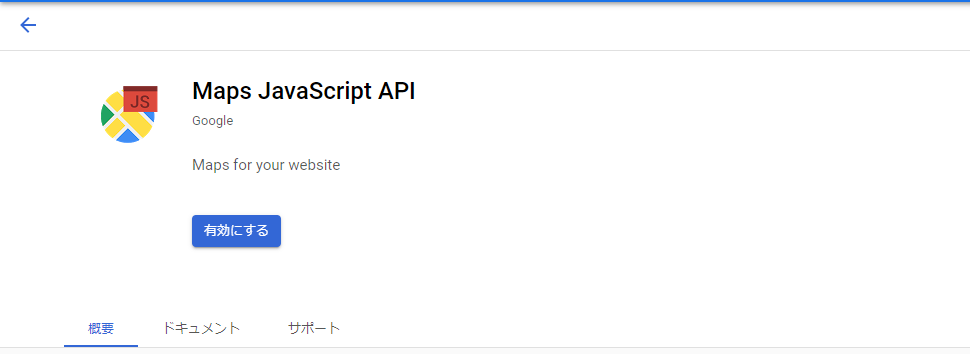
APIキーを取得する
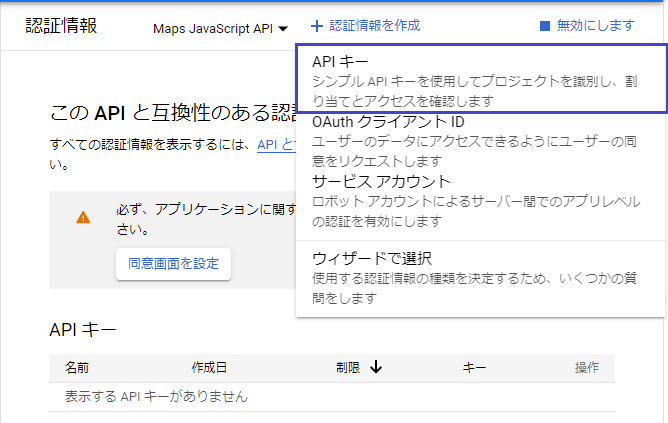
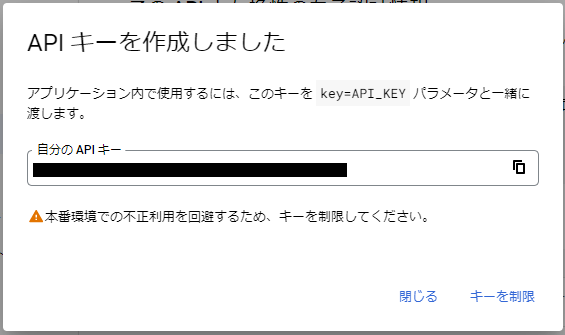
スクリプトでAPIキーを使用するので、コピーしておきます。
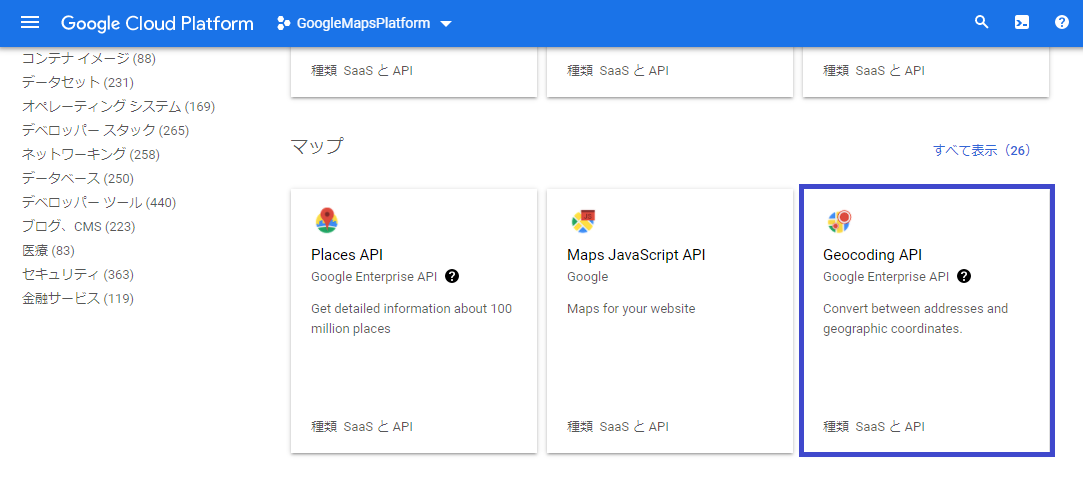
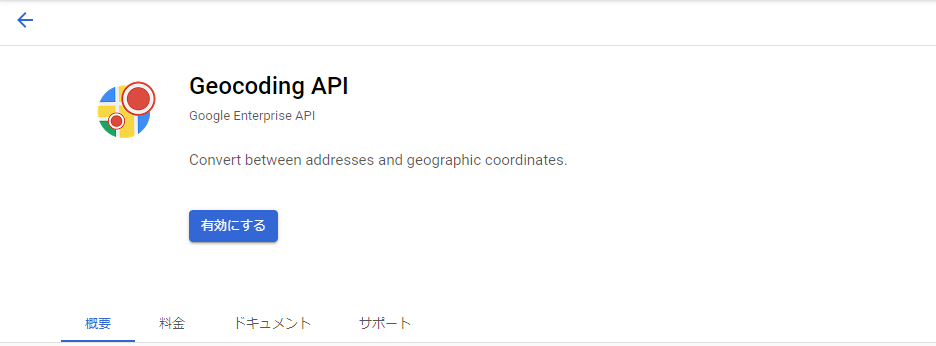
Geocoding APIを有効化する
HTML
表示用のHTMLとなりますので、参考までに。
<!DOCTYPE html>
<html>

<head>
    <title>Google Map API</title>
    <meta name="viewport" content="initial-scale=1.0">
    <meta charset="utf-8">
    <script src="https://maps.google.com/maps/api/js?key=[APIキー]&language=ja"></script>
    <style>
    #google_map {
        height: 100%;
    }

    .map {
        height: 300px;
        width: 800px;
        margin: 30px;
    }
    </style>
</head>

<body>
    <div class="map">
        <div id="google_map" width="600" height="450" style="border:0;" allowfullscreen="" loading="lazy"></div>
    </div>
    <script>
        const target = document.getElementById('google_map');
        const address = "千葉県松戸市岩瀬38-3";
        const geocoder = new google.maps.Geocoder();

        geocoder.geocode({ address: address }, function (results, status) {
            if (status === 'OK' && results[0]) {
                // Map取得
                const map = new google.maps.Map(target, {
                    zoom: 15,
                    center: results[0].geometry.location,
                    mapTypeId: 'roadmap'
                });

                // Marker取得
                const marker = new google.maps.Marker({
                    position: results[0].geometry.location,
                    map: map
                });

                // 情報ウィンドウ設定
                const latlng = new google.maps.LatLng(results[0].geometry.location.lat(), results[0].geometry.location.lng());
                const info = '<div class="info">' +
                    '<p>' + address + '</p>' +
                    '<p><a href="https://maps.google.co.jp/maps?q=' + latlng + '&iwloc=J" target="_blank" rel="noopener noreferrer">Googleマップで見る</a></p>' +
                    '</div>';
                var infowindow = new google.maps.InfoWindow({
                    content: info
                });

                // 情報ウィンドウ表示
                infowindow.open(map, marker);

                // クリックイベント設定
                google.maps.event.addListener(marker, 'click', function () {
                    infowindow.open(map, marker);
                });
            } else {
                return;
            }
        });
    </script>
</body>
</html>
JavaScript
では、GoogleMapsAPIを用いた処理をみていきます。
APIコール用script(コピーしておいたAPIキーを使用)
<script src="https://maps.google.com/maps/api/js?key=[APIキー]&language=ja"></script>Geocoderクラス生成
住所情報を渡して結果(results)を取得します。
const address = "千葉県松戸市岩瀬38-3";
const geocoder = new google.maps.Geocoder();

geocoder.geocode({ address: address }, function (results, status) {
    if (status === 'OK' && results[0]) {
 } });
Map取得
・zoom : ズームレベル(0~22)
・center : 座標
・mapTypeId :
roadmap – デフォルトの地図
satellite – GoogleEarthの衛星画像を使った地図
hybrid – roadmapとsatelliteを混合した地図
terrain – 地形情報に基づいた物理的な地図
// Map取得
const map = new google.maps.Map(target, {
zoom: 15,
center: results[0].geometry.location,
mapTypeId: 'roadmap'
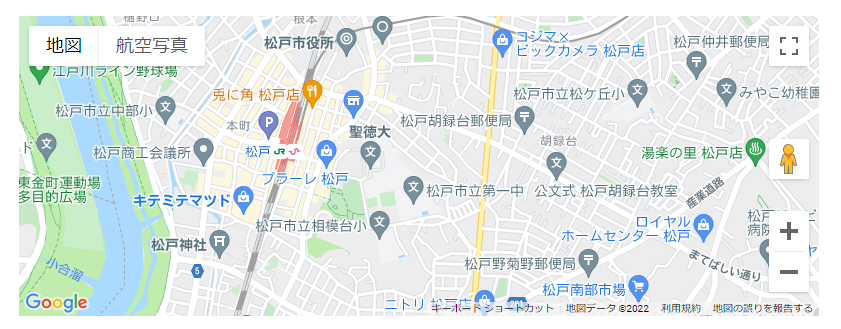
});地図が表示できました。
Marker取得
// Marker取得
const marker = new google.maps.Marker({
position: results[0].geometry.location,
map: map
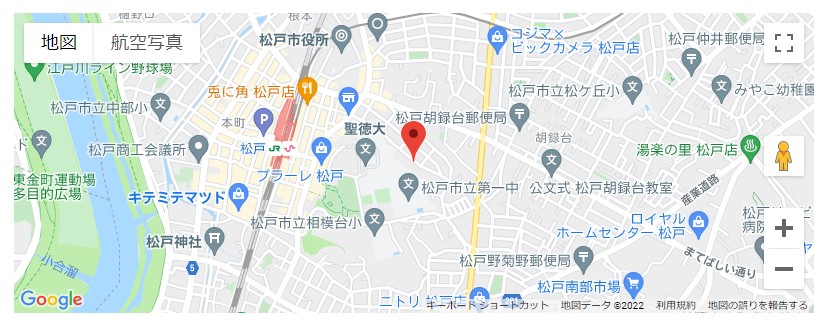
});地図にマーカーが表示できました。
情報ウィンドウ表示
content : 表示したい情報(任意)
// 情報ウィンドウ設定
const latlng = new google.maps.LatLng(results[0].geometry.location.lat(), results[0].geometry.location.lng());
const info = '<div class="info">' +
'<p>' + address + '</p>' +
'<p><a href="https://maps.google.co.jp/maps?q=' + latlng + '&iwloc=J" target="_blank" rel="noopener noreferrer">Googleマップで見る</a></p>' +
'</div>';
var infowindow = new google.maps.InfoWindow({
content: info
});
// 情報ウィンドウ表示
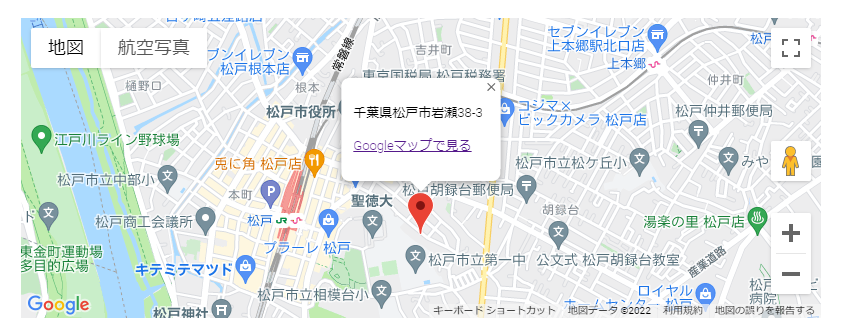
infowindow.open(map, marker);地図に吹き出しが表示できました。
以上となります。
最後まで読んでいただき、ありがとうございました!